
Surya Namaskar, or Sun Salutation, is one of the most popular and trending yoga sequences practiced worldwide. Whether you're a beginner exploring yoga for fitness or an advanced practitioner deepening your asana journey, learning the surya namaskar steps correctly is essential. The sequence looks simple, but each pose is purposeful—connecting breath, body, and mind.
01What is Surya Namaskar?
)
Surya Namaskar is a sequence of twelve yoga postures performed in a flow, synchronised with breath. Traditionally, it is a way of paying respect to the sun, seen as a source of life and energy.
Surya Namaskar has roots in Vedic traditions, where the rising sun was worshipped as a symbol of consciousness and vitality. Over centuries, yogis refined this into a physical practice combining asanas with breathwork (pranayama) and mantras. Today, it is an integral part of modern yoga, often used as a warm-up before asana practice or as a complete practice on its own.
Surya Namaskar in modern yoga
In contemporary yoga, Surya Namaskar bridges tradition and modern fitness. It strengthens muscles, stretches the body, and improves cardiovascular endurance—all in a short, dynamic sequence. It's accessible to beginners yet endlessly challenging for experienced practitioners.
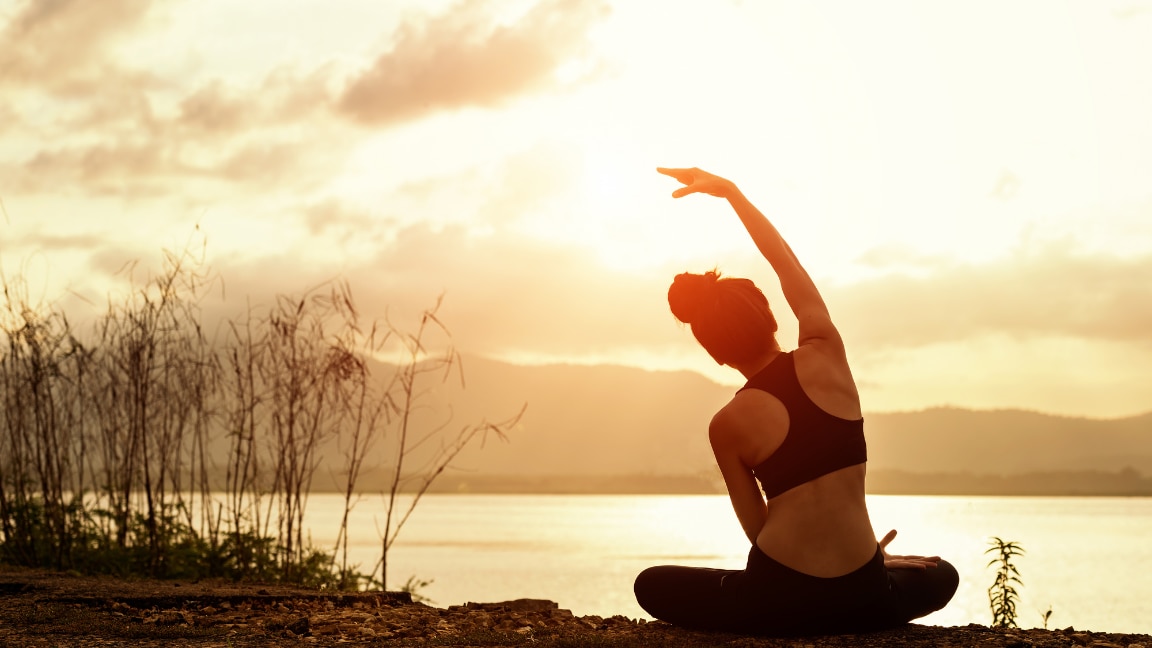
02Top Benefits of Surya Namaskar for Body & Mind
)
The benefits of surya namaskar extend to body, mind, and energy. As yogasana teacher Shaili C shares: "Physically, it's a great warm-up before your asana practice. The postures work on every part of the body, and the practice fans the flames of a slow-burning metabolic fire—wonderful for those with sluggish digestion. Mentally, it sharpens focus, increases clarity, and leaves you with more energy."
- Enhances flexibility and muscle strength
- Boosts circulation and cardiovascular health
- Aids digestion and metabolism
- Improves posture and spinal health
- Builds stamina and endurance
- Supports weight management
- Reduces stress and improves mental clarity
- Promotes mindfulness through breath awareness
03Surya Namaskar Steps: The Complete 12-Step Sequence
The surya namaskar poses are performed in a flowing sequence, linked with breath. Here's a breakdown of the surya namaskar 12 steps:
1. Pranamasana (Prayer Pose)
)
How to do it: Stand tall with your feet together, spine straight, and shoulders relaxed. Bring your palms together at the center of your chest in a prayer position. Focus your gaze forward and establish a calm, centered presence.
Breathing: Exhale deeply, grounding yourself and connecting with your intention for the practice.
2. Hastauttanasana (Raised Arms Pose)
)
How to do it: Lift your arms up and overhead, keeping them shoulder-width apart. Gently arch your back, lifting your chest toward the sky. Create a gentle backward bend, ensuring your neck remains comfortable.
Breathing: Inhale deeply as you stretch upward, lengthening your spine and expanding your chest.
3. Hasta Padasana (Hand to Foot Pose)
)
How to do it: Fold forward from your hips, keeping your spine long. Bring your hands down beside your feet, placing your palms flat on the floor if possible. Try to bring your forehead toward your knees, releasing tension in your neck and shoulders.
Breathing: Exhale completely as you fold forward, releasing any tightness in your back.
4. Ashwa Sanchalanasana (Equestrian Pose)
)
How to do it: Step your right leg back into a lunge position, placing your right knee on the ground. Keep your left knee bent at a 90-degree angle, ensuring it stays directly above your ankle. Place your palms firmly on the floor beside your left foot. Lift your chest and gaze upward, creating a gentle arch in your upper back.
Breathing: Inhale as you step back, opening your chest and expanding your lungs.
5. Dandasana (Stick Pose / Plank)
)
How to do it: Bring your left leg back to meet your right, creating a straight line from head to heels. Keep your arms straight with palms flat beneath your shoulders. Engage your core muscles, tuck your tailbone slightly, and keep your body parallel to the floor.
Breathing: Hold your breath briefly or exhale as you move into the plank position.
6. Ashtanga Namaskara (Eight Limbed Pose)
)
How to do it: Lower your knees to the floor first, then gently bring your chest and chin down. Your eight body parts should touch the ground: two feet, two knees, two hands, chest, and chin. Keep your hips and abdomen slightly elevated off the floor.
Breathing: Exhale as you lower down in a controlled manner.
7. Bhujangasana (Cobra Pose)
)
How to do it: Slide your body forward and lift your chest off the ground. Press your palms into the floor beneath your shoulders and straighten your arms partially or fully. Draw your shoulders back and down, away from your ears. Lift through your sternum, creating a gentle backbend.
Breathing: Inhale deeply as you lift your chest, opening your heart space.
8. Adho Mukha Svanasana (Downward Dog)
)
How to do it: Lift your hips up and back, forming an inverted V-shape with your body. Press your hands firmly into the ground with fingers spread wide. Straighten your legs as much as comfortable, pressing your heels toward the floor. Keep your head between your arms and gaze toward your navel or thighs.
Breathing: Exhale fully as you push back into this resting inversion.
9. Ashwa Sanchalanasana (Equestrian Pose)
How to do it: Step your right foot forward between your hands, aligning your right knee over your ankle. Lower your left knee to the ground and extend your left leg back. Place your palms on either side of your right foot. Open your chest and look upward, creating length along the front of your body.
Breathing: Inhale as you lunge forward, expanding your ribcage.
10. Hasta Padasana (Hand to Foot Pose)
How to do it: Bring your left foot forward to meet your right foot. Straighten both legs as much as possible while keeping your hands on the floor beside your feet. Fold deeply from your hips, allowing your upper body to drape over your legs. Relax your head and neck completely, letting gravity deepen the stretch.
Breathing: Exhale as you fold forward, surrendering into the stretch.
11. Hastauttanasana (Raised Arms Pose)
How to do it: Sweep your arms out to the sides and overhead as you rise up. Engage your core and lift from your chest. Create a gentle arch in your upper back, reaching your arms up and slightly back. Keep your gaze forward or gently look up, maintaining length in your neck.
Breathing: Inhale deeply as you lift, filling your lungs completely.
12. Pranamasana (Prayer Pose)
How to do it: Return to an upright standing position. Bring your palms back to the center of your chest in prayer position. Stand tall with your spine straight, shoulders relaxed, and weight balanced. Take a moment to feel the effects of the complete round.
Breathing: Exhale completely, bringing steady, calm breath back to your body.
04How to Do Surya Namaskar Properly for Maximum Benefits
)
Breath awareness
Shaili emphasises: "Breath awareness is most important. Breath moves prana (energy) through the body. If you're doing this without breath awareness, the essence of the practice is lost. Inhale for every upward movement and exhale for every downward movement."
Timing and repetition
- Beginners: 3–5 rounds
- Intermediate: 6–12 rounds
- Advanced: up to 24 rounds for a full workout
Daily routine suggestions
Morning is the best time for Surya Namaskar—on an empty stomach—to align body and mind with the day's rhythm. Even 10–15 minutes can make a big difference in energy levels.
05Safety precautions
- Practise on an empty stomach or at least 3–4 hours after a meal.
- Warm up your joints before beginning the sequence.
- Keep movements slow and controlled to prevent strain.
- If you have back pain, high blood pressure, or are pregnant, consult a doctor before practising.
Common mistakes to avoid
- Holding your breath or skipping breath–movement coordination.
- Rushing through poses instead of focusing on posture and alignment.
- Pushing beyond your current flexibility, which can lead to injury.
- Practising on a hard surface without a yoga mat for support and cushioning.
06Tips for beginners
)
- Start slow: Learn the surya namaskar steps first before speeding up
- Focus on alignment, not speed
- Sync every movement with breath
- Practise on an empty stomach
- Use a yoga mat for cushioning
- Warm up your joints before starting
- Stop if you feel pain (discomfort is fine, sharp pain is not)
07Conclusion
)
Surya Namaskar is more than just a yoga sequence—it's a holistic practice for physical strength, flexibility, mental clarity, and energy. By learning the surya namaskar poses with correct breathwork, alignment, and consistency, you can unlock its full benefits.
Beyond fitness, this practice also acts as a bridge between movement and meditation. When performed with awareness, it can quiet the mind, balance energy levels, and prepare you for the day ahead. Think of it as a daily ritual of self-care that nourishes both body and spirit, keeping you centred and energised.
08FAQs
1. What is Surya Namaskar?
It's a 12-step yoga sequence performed with breath awareness, traditionally as a salutation to the sun.
2. What are the main benefits of Surya Namaskar?
The benefits of surya namaskar include improved flexibility, digestion, posture, stamina, and mental clarity.
3. How many Surya Namaskar rounds should I do daily?
Beginners can start with 3–5 rounds, gradually increasing to 12 rounds.
4. How to do Surya Namaskar correctly?
Focus on alignment, breathe consciously (inhale upward, exhale downward), and avoid rushing.
5. Can beginners do Surya Namaskar?
Yes, but start slow, listen to your body, and follow proper guidance to avoid strain.
6. When is the best time to practise?
Morning on an empty stomach is ideal, but you can also practise in the evening after a gap of 3–4 hours post meals.